Your code signing certificate has arrived on a USB hardware token. Since June 2023, this is how every commercially issued OV and EV code signing certificate is delivered (unless you chose a cloud HSM service): the private key is generated inside the token at the CA’s facility and can never be extracted from it. The token is now the only place your signing key exists.
This guide walks through everything from opening the package to producing your first verified signature, including the PIN model that catches most new token owners off guard, and the handling habits that keep a small piece of plastic from becoming a business continuity problem.
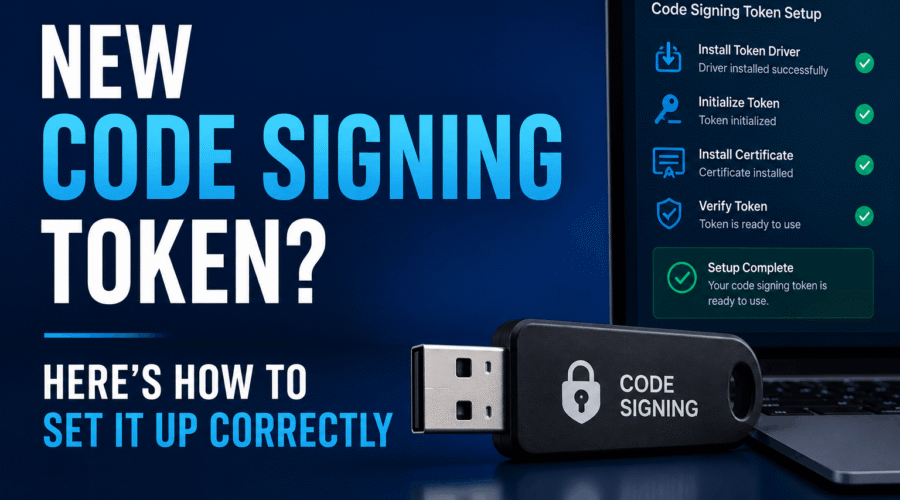
Step 0: Know What You Should Have Received
CAs deliberately split the delivery across channels so that intercepting one shipment doesn’t compromise the key. Confirm you have all of the pieces before starting:
- The USB token itself: shipped by courier or post. Most CAs ship a SafeNet eToken 5110 series (Thales) or a similar FIPS 140-2 Level 2+ certified device. Check the model name printed on the token; you will need it to pick the right driver.
- The token password or initialization PIN: sent through a separate channel: a second email, an account portal message, or printed material in separate post. If it was in the same envelope as the token, mention it to your CA; that is not how it is supposed to work.
- A driver or middleware download link: usually in the fulfillment email, pointing to a specific version of SafeNet Authentication Client (SAC) or the CA’s own utility.
- Your CA account access: some CAs require you to confirm receipt or activate the certificate in their portal before first use.
Step 1: Install the Driver Before You Plug Anything In
This ordering is the single most common setup mistake. If you connect the token first, Windows installs a generic smart card driver that half-works: the token appears in Device Manager, but the certificate never shows up for signtool, and the resulting troubleshooting wastes an afternoon.
Download the middleware version your CA specified (typically SafeNet Authentication Client 10.x for SafeNet/Thales tokens) and run the installer with the token still in its packaging. Install with default options, restart if prompted, and only then connect the token.
Install the version your CA names in the fulfillment email, not the newest version on the manufacturer’s site. CAs test their certificate profiles against specific middleware versions, and newer releases occasionally break compatibility with tokens provisioned under older profiles. If the CA’s link is dead, their support page lists the supported version.
Step 2: Connect the Token and Confirm It Is Recognized
Plug the token directly into a USB port on the machine. Open SafeNet Authentication Client (or your token’s equivalent): the token should appear by name in the left panel within a few seconds.
| # Confirm Windows sees the token as a smart card device:
> certutil -scinfo # Your token should appear in the reader list.
# Confirm the certificate is visible with its private key: > Get-ChildItem Cert:\CurrentUser\My -CodeSigningCert | Select-Object Subject, Issuer, NotAfter, HasPrivateKey # Expect: your organization as Subject, the CA as Issuer, # and HasPrivateKey = True while the token is connected. # Unplug the token and run it again: the certificate disappears. # That is correct behavior; the key lives on the token, not on the PC. |
Step 3: Understand the Three Secrets, Then Change the Token Password
SafeNet-class tokens have a layered secret model, and confusing the layers is how tokens get bricked:
| Secret | Also called | What it does | Lockout behavior |
| Token Password | User PIN | Authorizes everyday signing operations. This is what signtool prompts for. | Locks after a set number of wrong attempts (commonly 5 to 15, model dependent). Can be unlocked with the Administrator Password. |
| Administrator Password | SO PIN (Security Officer) | Unlocks a locked Token Password and performs administrative resets. | Limited attempts. If the Administrator Password itself is exhausted, the token is permanently locked. No one, including the CA and Thales, can recover it. |
| Digital Signature PIN (EV tokens, where present) | Additional PIN | Some EV provisioning adds a separate PIN required per signature for the signing key specifically. | Same caution: limited attempts, administrative unlock path varies. |
First action after the token is recognized: change the Token Password from the CA-supplied default using SafeNet Authentication Client (Change Token Password in the main view). Use a strong passphrase you can store in your password manager; you will type it at every signing session.
Do not initialize the token. SafeNet Authentication Client has an Initialize Token option that wipes the device, including your certificate and the unexportable private key. There is no undo: the certificate must be revoked and reissued on new hardware. Treat Initialize, and any Administrator Password experimentation, as off-limits unless your CA’s support explicitly instructs it.
Step 4: Produce and Verify Your First Signature
Test with a throwaway file before signing anything you intend to ship:
| # Sign a test executable (the /a flag auto-selects the token’s certificate):
signtool sign /a /fd sha256 /tr http://timestamp.digicert.com /td sha256 /v TestApp.exe # SafeNet will prompt for the Token Password during the operation.
# Verify the signature: signtool verify /pa /v TestApp.exe # Expect: ‘Successfully verified: TestApp.exe’ # Check that the signer name shown matches your organization exactly.
# If you have multiple code signing certificates, pin the token’s cert by thumbprint: > Get-ChildItem Cert:\CurrentUser\My -CodeSigningCert | Select-Object Subject, Thumbprint signtool sign /sha1 YOUR_TOKEN_CERT_THUMBPRINT /fd sha256 /tr http://timestamp.digicert.com /td sha256 /v TestApp.exe |
Enable single sign-on in SafeNet Authentication Client (Client Settings > Advanced) if you sign many files per session: the Token Password is cached for the session instead of prompting per file. For bulk signing, pass all files in one signtool invocation; one command signing fifty files prompts once, fifty commands prompt fifty times.
Using the Token on Other Machines
The certificate travels with the token, not with any computer. To sign from a second machine: install the same middleware version there, plug in the token, and sign. Nothing needs to be exported or copied, and nothing can be: the key is not exportable.
What does not work: remote desktop sessions often cannot reach a token plugged into the remote machine’s USB without smart card redirection configured, virtual machines need USB passthrough explicitly enabled, and cloud CI runners cannot use a physical token at all. If pipeline signing is in your future, that is the cloud HSM use case, not a token use case.
Token Care: Habits That Prevent Bad Days
- Unplug when not signing: a connected, unlocked token lets any malware on the machine request signatures. Plug in, sign, unplug is the discipline that limits the exposure window.
- Avoid unpowered USB hubs: tokens are sensitive to marginal power. Intermittent recognition problems trace to hubs and front-panel ports more often than to the token. Use a direct rear-panel port when troubleshooting.
- Store it like a key, because it is one: a locked drawer or safe when not in use. Record its physical location; the failure mode in small teams is not theft but ‘whose laptop bag is it in.’
- Plan for loss before it happens: know your CA’s revoke-and-reissue process and its turnaround. A lost token means revocation, reissue on new hardware, and shipping time. Releases scheduled during that window slip.
- Calendar the expiry: the certificate on the token lasts at most 460 days. Set reminders at 60 and 30 days; renewal means a new validation cycle and usually new hardware in the mail.
Quick Troubleshooting
| Symptom | Likely cause | Fix |
| Token not listed in SafeNet client | Driver installed after connecting, or hub power issue | Unplug, reinstall the specified middleware version, reconnect to a direct USB port |
| Certificate absent from Get-ChildItem | Token locked or PIN not yet entered this session | Open SafeNet client, enter Token Password, re-check |
| signtool: no certificates found | Token disconnected, or another cert being auto-selected | Reconnect token; use /sha1 with the token cert’s thumbprint |
| PIN prompt never appears, signing hangs | Middleware version conflict or stale session | Update to CA-specified SAC version; restart; enter PIN in SAC before running signtool |
| ‘Token Password locked’ message | Too many wrong PIN attempts | Unlock via Administrator Password in SAC. If you don’t have it, contact your CA before guessing |
| Works on one PC, not another | Middleware missing or version mismatch on second machine | Install the same SAC version on every machine that signs |
Frequently Asked Questions
Can I copy the certificate off the token as a backup?
You can export the public certificate (useful for nothing security-critical), but the private key cannot be exported by design. That is the entire point of hardware delivery: a key that cannot be copied cannot be silently stolen. The corollary is that there is no backup. If the token is lost, damaged, or permanently locked, the recovery path is revocation and reissue through your CA, not a restore.
My laptop only has USB-C ports and the token is USB-A. Is an adapter safe?
Yes. A simple passive USB-C to USB-A adapter works reliably with signing tokens. Problems arise with multi-port travel hubs that share power across devices; if the token drops out intermittently on a hub, test it on a direct adapter before suspecting the token itself.
Should I leave the token in my build server so nightly builds can sign?
It works mechanically, and it is the setup most worth reconsidering. A permanently connected token with a cached PIN gives anything running on that server an unattended signing capability, which converts a server compromise into a signed-malware incident. If automated signing is a real requirement, the cloud HSM signing services (DigiCert KeyLocker, SSL.com eSigner, Microsoft Trusted Signing) authenticate and log every operation and exist precisely for pipelines. Reserve the token for interactive, human-initiated signing.

Gloria Bradford is a renowned expert in the field of encryption, widely recognized for her pioneering work in safeguarding digital information and communication. With a career spanning over two decades, she has played a pivotal role in shaping the landscape of cybersecurity and data protection.
Throughout her illustrious career, Gloria has occupied key roles in both private industry and government agencies. Her expertise has been instrumental in developing state-of-the-art encryption and code signing technologies that have fortified digital fortresses against the relentless tide of cyber threats.